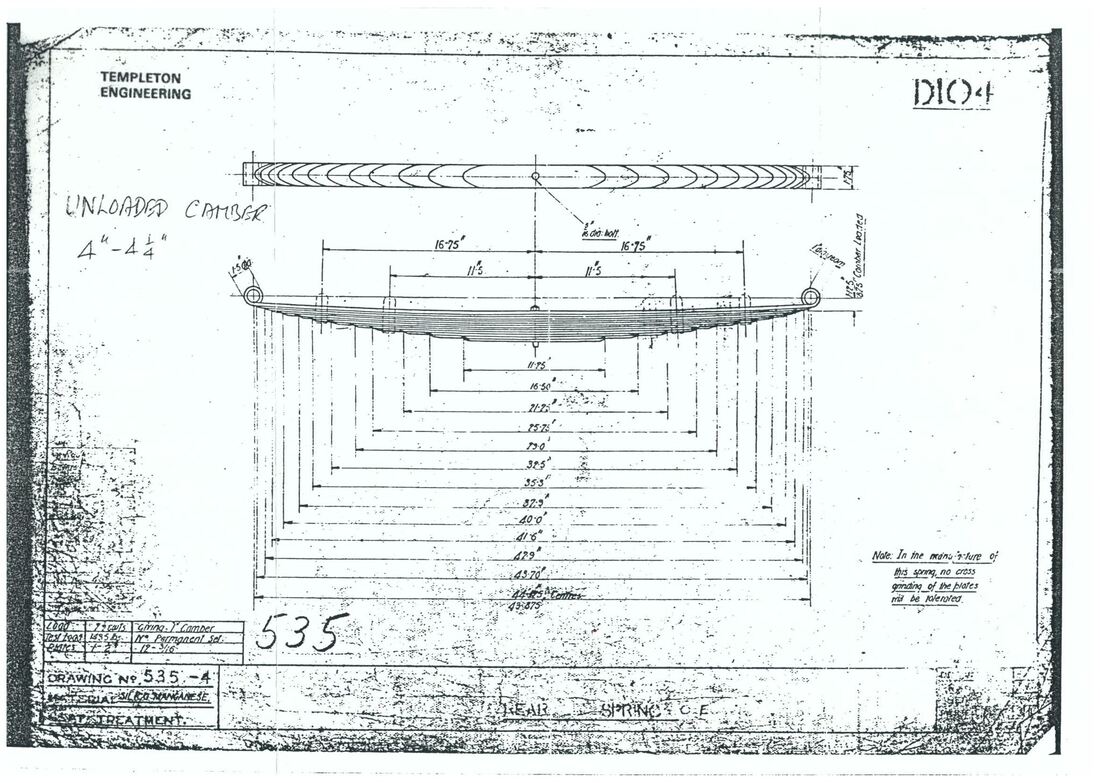
Rear Springs E & OE
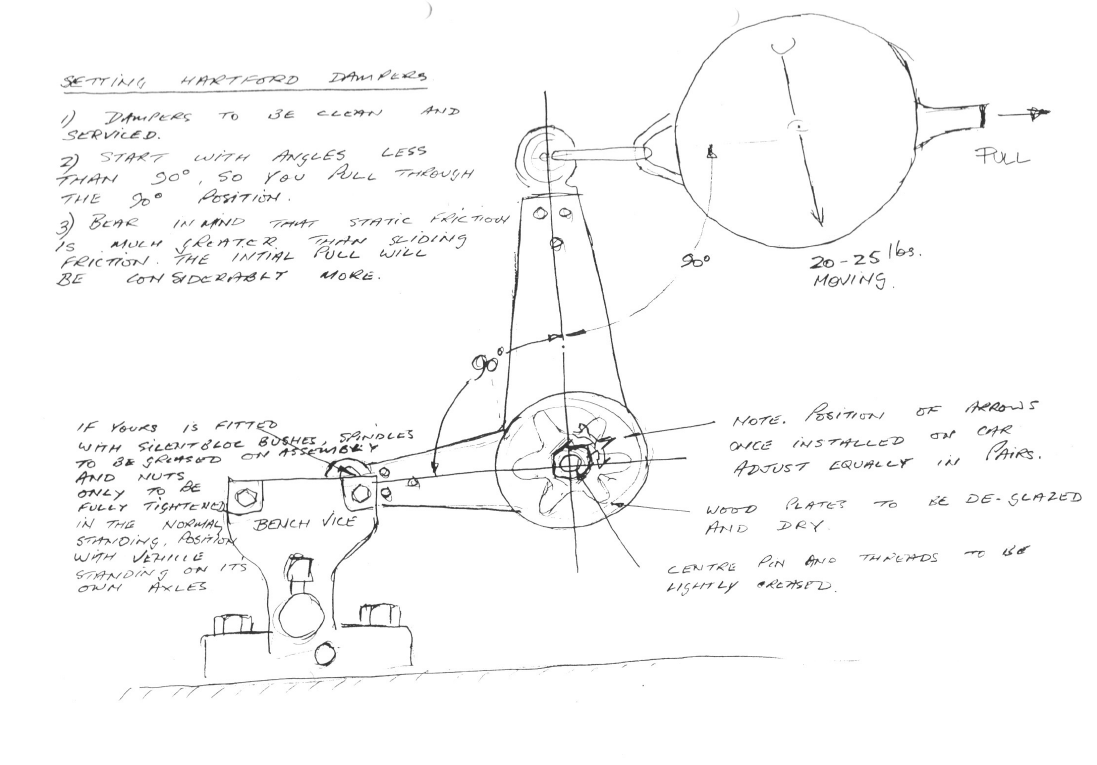
Hartford Instruction Manual
All OE 30-98s were fitted with Hartford shock absorbers:
| hartford_manual.pdf | |
| File Size: | 3382 kb |
| File Type: | |
Hartford Adjustment
Rear hub Puller
To get the rear hubs off to check the brake shoes etc, a hub puller is necessary. These are available from Julian Ghosh. Contact: [email protected]
The Back Axle by Tim Jones
The 30-98 back axle is a very robust item that we can take for granted for decades. When it’s time for a bit of maintenance, there are a few ground rules to keep to. This is based on recent experience with OE202, and written in the hope it might save trouble for others.
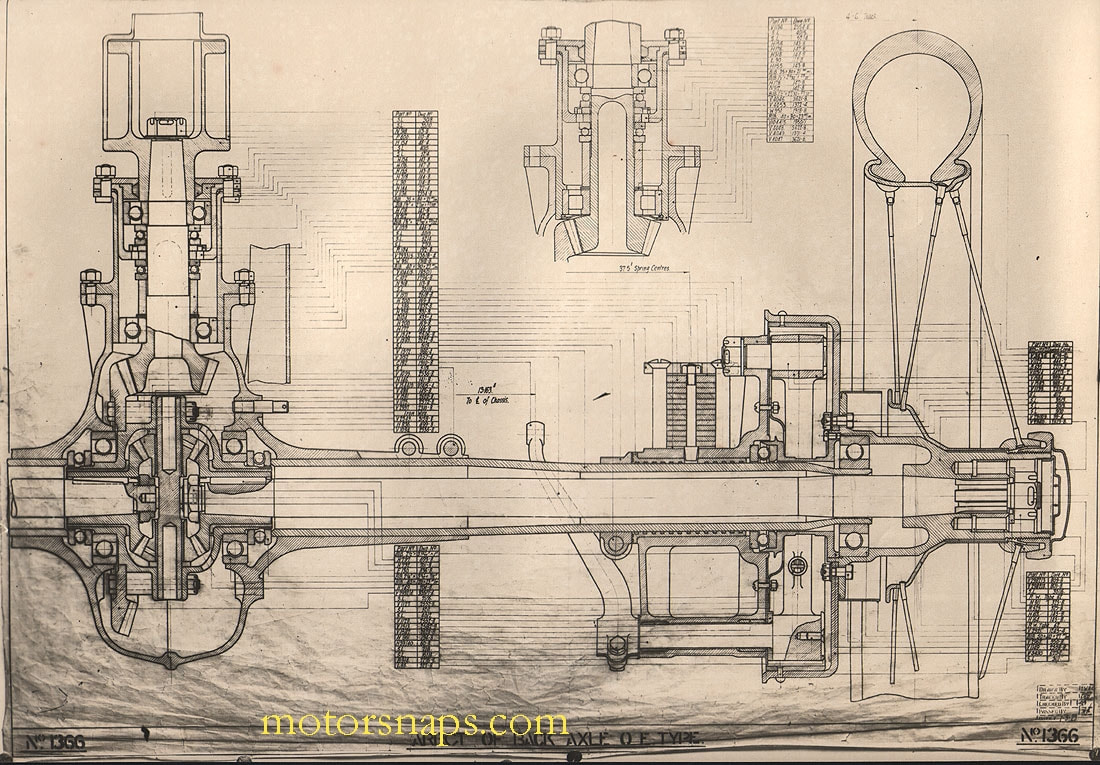
After nearly 30 years of hard work, OE202 developed an unwelcome transmission clunk. The first step is to find where the clunk originates. After discounting a loose gearbox drive flange, the next test is the pinion flange. There are three distinct movements here, and they make more sense with the drawing (left):
After nearly 30 years of hard work, OE202 developed an unwelcome transmission clunk. The first step is to find where the clunk originates. After discounting a loose gearbox drive flange, the next test is the pinion flange. There are three distinct movements here, and they make more sense with the drawing (left):
- a few thou of crown wheel and pinion backlash, quite normal.
- A bit more movement in the differential gears. This can be about 1/8” on the outside diameter
- If you can move the pinion further with some leverage, there is a problem. It could be half shaft to hub, or loose pinion flange (which you can check by watching them as you move the pinion). If there is no movement here, the only option is a loose or cracked bevel gear on the halfshaft inner end. Once loose, these can burst and split the diff cage. Best avoided.
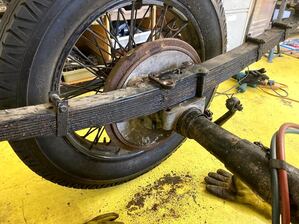
Removing the axle should be straightforward as it hangs below the springs. After removing the hubs and brake drums, there are 4 long bolts on each side to release it from the springs. But those long bolts are prone to seizing in the cast aluminium saddles, as in the attached picture of ROE9. Soaking with penetrating fluid for a week will help, as can a bit of heat. Then you might need to hit them hard with a copper hammer. After all this it’s likely you’ll remember to paint the bolts and load it with grease when it goes back together.
Loosen the pinion housing nuts, then remove the row of bolts that hold the axle halves together. Remove the ring of bolts holding the crown wheel to the diff cage and order a set of new 12.9 grade high tensile bolts and self locking nuts straightaway. I found one original bolt broken and the nut luckily ground to paste without damaging anything. Not a risk worth taking.
Loosen the pinion housing nuts, then remove the row of bolts that hold the axle halves together. Remove the ring of bolts holding the crown wheel to the diff cage and order a set of new 12.9 grade high tensile bolts and self locking nuts straightaway. I found one original bolt broken and the nut luckily ground to paste without damaging anything. Not a risk worth taking.
|
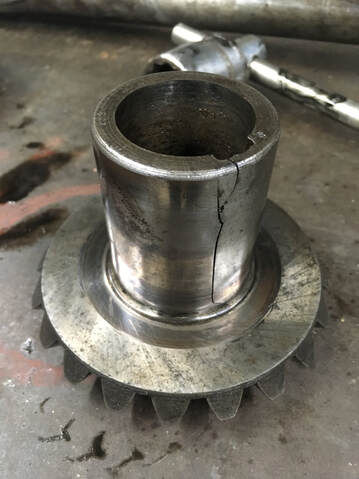
Now you’re at the heart of the matter. Once you’ve cleaned the halfshafts, you can check the bevel gears for cracks. If they look like the one shown right, you have a shiny new paperweight.
If you do need to replace one, logic says that you should replace both, and the differential gears. They are made as a set and this way you get perfect mesh. But if you replace just one gear, you won’t be the first to do so. At this point, the euphoria at finding and fixing the problem manifested in a hurried and careless re-assembly. The result 3 months later was my first broken half shaft and, if you don’t want to copy me, read on. The aluminium spring saddles are located sideways by the ring clamps pinchbolted to the axle tubes. These are very important pieces. Unlike many, the 30-98 halfshaft doesn’t float and is located at the inner end by the diff cage. When tightening the hub onto the taper, the aluminium saddle must be free to push up the axle tube until the taper is good and tight. Likewise, the splined end of the halfshaft mustn’t protrude beyond the end of the pegged drive block. Mistakes here will stop the taper mating properly, taking the drive through the splines and pegs and carrying the weight of the car on the end of the shaft. When it breaks, avoid being towed home as there is nothing to stop the wheel and hub falling off. That’s one mistake I didn’t make. |
To make sure the taper is going to mate properly, it’s best to test assemble the hubs, halfshafts and peg blocks off the car first.
The 30-98 hub is often maligned, but it’s a good solution to a difficult problem. A conventional keyway machined into a halfshaft is a weak point, and Vauxhall entirely avoided this. Moreover, they made the shafts out of some magic steel that is tough enough to do the job, but ductile enough not to crack. Witness the number of discarded halfshafts that have been twisted though about 20 degrees at the splines, which will only happen if the taper has come loose and the drive is taken through the splines and pegs. By this time a woodruff key would have long expired. So my choice is to keep to the original system, and do everything needed to make sure the taper is working properly, saving those splines and pegs from any real work.
Then when finally assembling, first loosen the ring clamps and push them up the axle tubes a few mm. To tighten the hubs onto the tapers I use a large ¾” drive socket with a 2’ bar, extended with a length of scaffold tube. When the taper is well home, tap the clamps up against the saddle and tighten the pinch bolts tight. These need to stay put, as they locate the axle sideways and keep the thrust races firmly assembled, helping to avoid bending loads on the halfshafts.
Like the rest of the car, these axles are simple and easy to maintain without any special tools, and well worth getting right.

